


My original idea for a "card box" was to just have a lined basket to match the ones I used for our petal cones and programs. Like this one from Kaboodle:
 But both the coordinator at our reception venue and all my family warned by against an uncovered card holder because of the risk of theft. Our reception was held at a coutry club where golfers or others might wander in and grab a card or two (I couldn't believe that! I was apalled when our coordinator said it had happened before.) So I was stuck. The only other option I'd heard of via Weddingbee was birdcages...and those just weren't my style.
I loved Mrs. Avocados' suitcases

but it still didn't solve the problem of a more secure card holder
Then my wonderful aunt jet went up to her attic one one of our crafting days and came down with a box that looked just like this:
 source
Then she got out a box cutter, brown spray paint, and a pile of silky cords in different shapes and sizes, all in my wedding colors! ("for embellishment" she said)
[Seriously, the jet's house/garage has any kind of crafting and building tool you can imagine.]
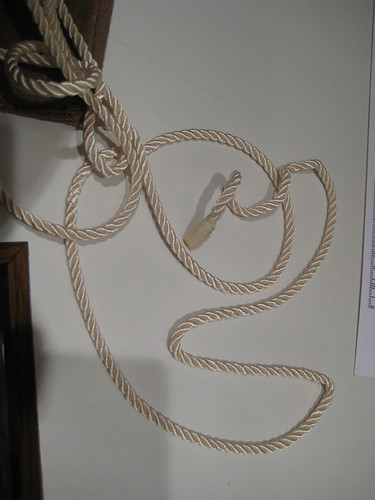
I picked this ivory colored rope and set it aside.
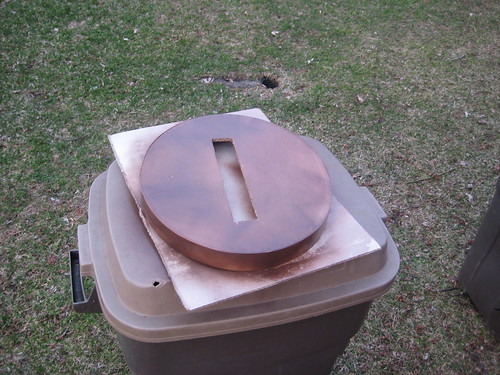
Then we started with the box. I took out the biggest greeting card I could find and used it to measure the hole, and added an inch. The hole was about 1.5" x 9". I cut it with the box cutter after tracing the lines with a ruler. Old hat boxes have really thick covers with several layers....so be careful when cutting!
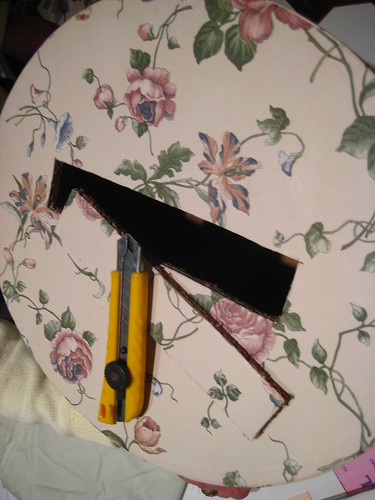
photo by me
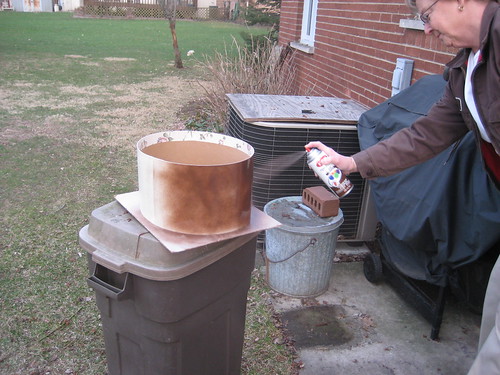
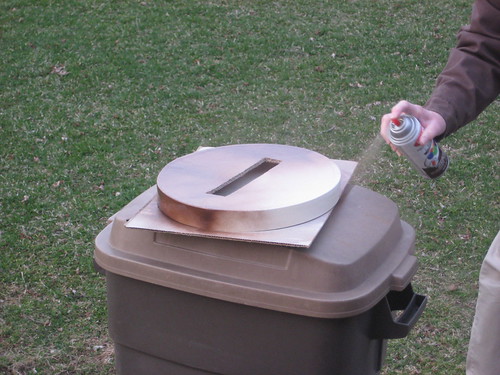
Next, We had to change the color of that vintage floral wallpaper stuck to the box.
In order to neutralize the color, we started with 2 layers of white spray paint.
The next week, we got to work on the brown. Ok Aunt Jet got to work while I took pictures:
As I was contemplating how to decorate the box, I remembered Miss Taffy's post on Weddingbee about the rope signs she made for her seed-themed shower.
Voila! We had our card-box idea.
I carefully traced with white chalk the word "cards". After many tries and much erasing, I got out craft glue and traced the chalk, on letter at a time. I wrote it in cursive not because I liked how it looked, but because the rope frayed very easily and I didn't want to have to cut it more than at the beginning and the end.
After carefully laying the rope over the glue outlined letters, I held the rounded letters ("r" and "d" were the hardest to keep together) with my hand for 10 minutes or so until i was confident they wouldn't slide around.
My first try, I felt that the letters were too off center and disproportionate so type A me ripped the rope off the box. re-spray painted the top, and started over!
see how big the "c" and "a" are compared to the "d"? yikes!
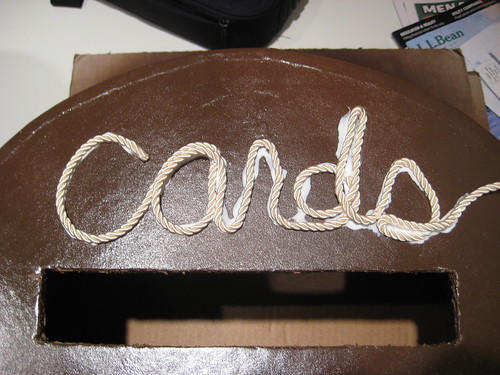
The second try was more successful (though still not centered!)
The glue dried within a day, completely clear....and this is what I ended up with!
 photo by Uncle Cam
photo by Little Hands Photography


